
In this article, you will be learning on How to install NPM in Ubuntu 18.04 Bionic. NPM which is also known as node package manager is a package manager for JavaScript programming language and is the default package manager for JavaScript runtime environment Node.js. It is written in the same JavaScript programming language.
NPM consists of a command line based client and an online database registry called the npm registry. The npm client directly interacts with the npm registry and has the ability to search, browse and download available JavaScript packages to the local machine. It can manage packages that are local dependencies of a particular project, as well as globally-installed JavaScript tools. These days, npm is bundled with nodejs installation and is included as a recommended feature in nodejs package. There are two popular methods to install npm in Ubuntu 18.04 LTS Bionic Beaver.
NPM install Using Ubuntu Repo
You can install npm in Ubuntu 18.04 LTS Bionic from the official ubuntu repository. In order to install npm from the official repository, you can use apt package manager. First, you’ll need to update the local software repository index with sudo privileges.
$ sudo apt update
Once the local repository index is updated, you can now install nodejs and npm
$ sudo apt install nodejs npm
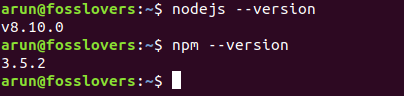
Now, you can check if nodejs and npm it’s successfully installed or not by checking the versions of the packages installed. While writing this article, you can see that the available version of nodejs was 8.10.0 and npm was 3.5.2 in the ubuntu 18.04 Bionic’s official software repository.
$ nodejs --version
v8.10.0
$ npm --version
3.5.2
Using NodeSource Repository
NodeSource is a US company which focuses on Node.js security and performance for the enterprise providing enterprise-graded support. They maintain a repository containing the latest and LTS (long term support) versions of Node.js. To install Node.js and npm from the NodeSource repository, you can follow the steps below.
First, you’ll need to update the local repository index by executing the command.
$ sudo apt update
Then, we’ll need to install curl as its your pre-requisites to install the NodeSource repository.
$ sudo apt install curl
Once curl is ready, you can now install the repository as per your requirement of the version of nodejs.
To install the latest release, execute
$ curl -sL https://deb.nodesource.com/setup_10.x | sudo bash -
To install the LTS (Long term support) release, execute
$ curl -sL https://deb.nodesource.com/setup_8.x | sudo bash -
Now, as the repository has been installed, you can now install nodejs and npm binaries by installing a single package called nodejs as shown below.
$ sudo apt install nodejs

Once done, you can check if nodejs and npm is successfully installed or not by checking the versions of the packages installed
$ nodejs --version
v10.15.1
$ npm --version
6.4.1

Conclusion
Hurray!! Congratulations, I hope you get to know how to install npm in Ubuntu 18.04 LTS Bionic Beaver. If you have any questions, suggestions, feedback please don’t hesitate to write them in the comment box below because it will help us to improve or correct our contents. Thanks, Happy FOSS Computing.
Read More: “100 Linux Commands – A Brief Outline With Examples Cheatsheet”